Design Process
Probably the most exciting part of design work is the incremental improvements in each iteration of the design. the enjoyment comes from trying something, testing it, and then finding a new improvement that can be made. (then of course "realizing" this thing you just thought of)
The design iterations of my Animatronic Eyes is a prime example. Currently I am in the middle of this design process where we "Design, Test, Improve, Repeat". I am moving between OpenSCAD, the printer, the assembly and testing, improvements ideas, and Repeat.
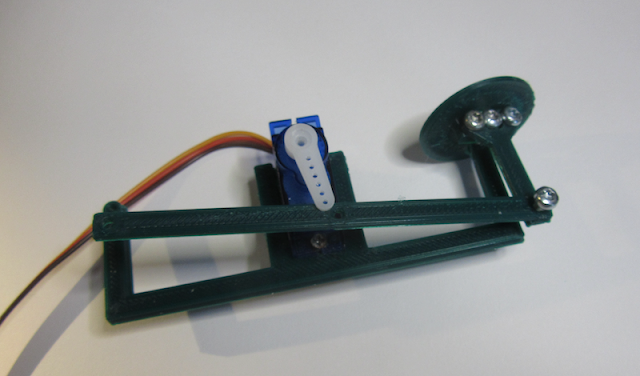 |
| Anamatroic Eyes - Early Prototyping (Back) |
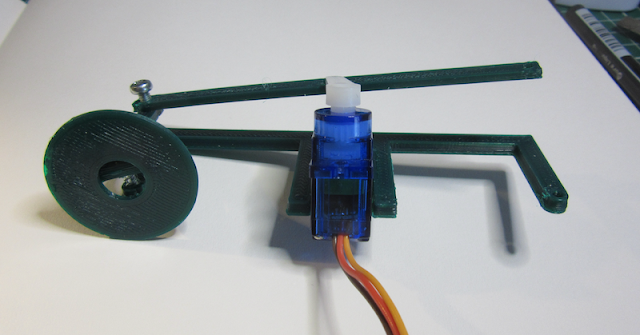 |
| Animatronic Eyes - Early Prototyping (Front) |
The Early prototype supports most of the ideas of the bigger vision. The eyes will independently move horizontally (left and right) and vertically (up and down). This will require two servos. In this design the eyes will be held in place by a frame that can (eventually) be tilted vertically. The frame will allow the eyes to be fixed, but a moving armature will provide the horizontal movement. This is consistent with many designs on the internet.
This very early prototype is functional, but quickly pointed out that my hole sizes for screws were all too small as well as the frame size. Note: It also clearly shows my minimalist view toward prototypes and products. It does not work correctly, but it works enough to improve the mistake and to start thinking of the next features (the vertical hinge, Eyes, and eyelids)
Back to OpenSCAD
 |
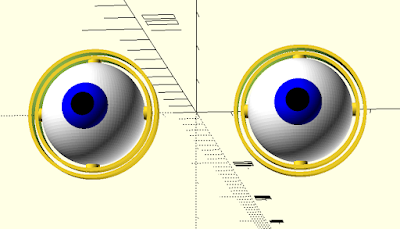
| Animatronic Eyes - Prototyping - backside - OpenSCAD |
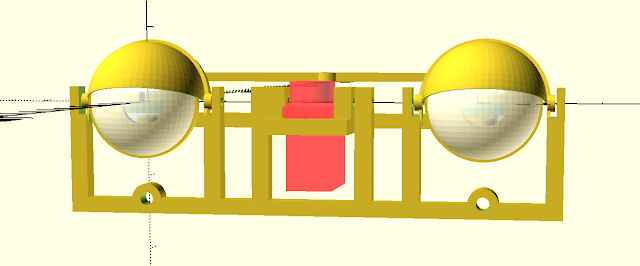 |
| Animatronic Eyes - Prototyping - frontside - OpenSCAD |
The next iteration adds primary frame to support the vertical hinge needed to tilt the eyes up and down. This hinge is located centrally and will support the Eye Frame that provides the primary eye support and horizontal servo control. the Frame also Supports for the eyelids.
This iteration will add the first version of the eyelids. I am starting with the top and a simple hinge method. In some sense all iterations may be 'mixed' between new features like the eyelids and improvements such as full servo mount on the eye support armature.
Printing it out
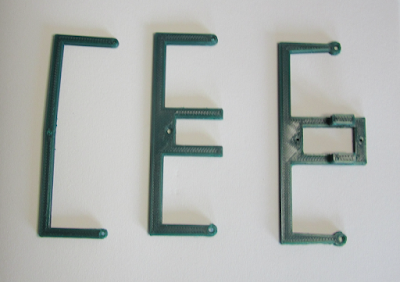 |
| Design Progression of the Horizontal Armature (version 1, 2, 3) |
In this picture you can see the progression of the iterations effect on the design. The first version on the left is just a simple mock up to see if it size of the armature would be good, and the thickness of the frame. Next support for the horizontal servo was added, and the end holes enlarged. Finally the servo support is strengthened, the end holes are strengthened, and support for the vertical hinge is added. Each iteration helps the next, with the first being pathfinders for the future design.
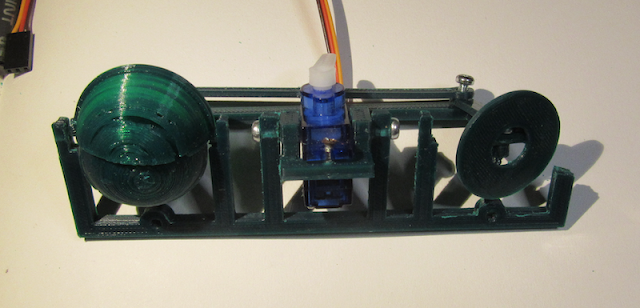 |
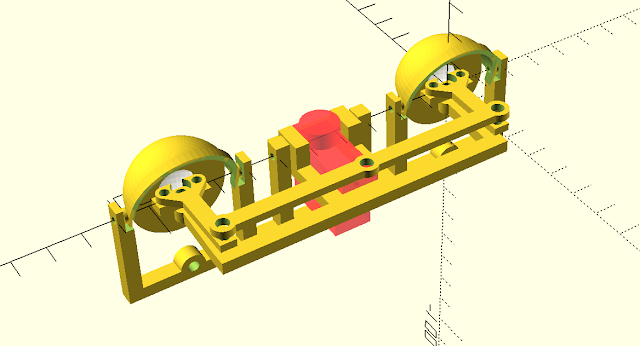
| Current Prototype version - Animatronic Eyes |
Finally, here is the current printed version of the prototype. Already it is obvious that the lid will need strengthening. I suspected the frame will need to be divided into parts, as it is difficult to manage the hinge pins in both the vertical hinge and the eyelids.
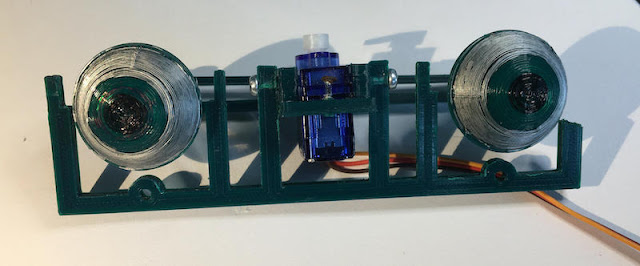 |
| Animatronic Eyes - early prototyping |
Onward and Upward!