 |
| This robot leg does not exist. -DALL-E & Doug |
I am in search of a "Stable" robot leg. Stable would mean that it can stand on its own without having to be activity lifted by the motors. In addition, it needs to be able to perform the basic function of lifting and moving in a 3 dimensional 'workspace'.
From a design perspective, lets go over a few requirements:
- Ability to stand freely supporting its own weight, and preferably some payload
- Ability to with stand some flexibility, some compliancy
- Ability to be raised and lowered with in some 'workspace' using up to 3 degrees of freedom (typically 3 servos)
- Use off the shelf servo motors, springs, 3D printing (PLA), and other common components.
With a stable leg, a biped or quadruped could be realized.
Mojo leg variants:
Here are the iterations of leg designs have I tried so far for the Robot Army.
Leg 1 - Mojo
This was a very primitive first step. but it has the features of compliance in the two springs. Obviously it could not support its weight. This was my first prototype and if you are interested in this kind of stuff - just do it! everyone has a first iteration.
 |
| the glass is half full!! |
Leg 2 - Mojo2
Mojo2 was a significant improvement in design and lead to a viable walking quadruped. The leg is driven by 2 servo motors. it has a compliant spring to provide stability to stand without motor assistance. The knee was actuated by a servo on the main chases that pulls a cam with a cable to the knee. This cam structure will lift the foot (lower leg) and works against the compression spring providing compliancy.
The issues with this design were centered around the ability for the leg to hold the weight of the robot against the strength to move the leg. At high duty cycles, the leg would drag along the floor, creating more of a shuffle. Overtime, the cable was prone to stretching, which reduced the performance. The over all vertical workspace was very limited due to the amount of compression allowed by the spring.
More information can be found on the project pages for Mojo2.
 |
| Mojo2 - Quadruped Robot Leg |
Leg 3 - Mojo3
The next design tried to remove design flaws in Mojo2. This design removed the forces being directly applied to the servos by introducing bearings. Servo motors only needed to turn gears, without having the weight of the robot transferred through the servo itself. The gears helped in this regard, but it was not obvious how to create compliancy in the design.
The design on the left hand was functional, but only provided a very small work space of only 4-6 mm. This video shows the amount of workspace available. The gear pinion on the right design, suffered from gear slippage.
This design also attempted to use 9g servo motors in a very small robot. ultimately, the servos could not provide the performance need to make the robot walk.
 |
| Mojo3 - quadruped robot leg designs |
Leg 4 - Mojo4 - the 5 bar design
In a completely new direction, the next design featured 2 servos moving parallel linkages similar to SCARA robot arms. The geometry of the legs was very important to simplify the calculations of the Kinematics. This is the first robot design where I was able to determine and code the kinematics. The workspace in a non-weight-bearing scenario is very large.
Unfortunately ... this design requires the servo motors to activity support the robot. This creates a large power draw which can limit the performance when all servos are firing. Other makers using this design have worked around this issue by introducing elastic bands to keep the leg standing, and reduce the power needed. With an upgrade this leg can be redesigned, it would require elastic (pulling) springs verses compression springs. For the scale of this leg (>20cm) it is has not been easy to source the springs.
 |
| Mojo4 - Five-bar style robot leg |
New Designs:
Bipedal Legs
In my research on the internet, I found variations of a bipedal robots that use just 2 servos per leg for the hip and knee joints, with additional compliant linkages for support. The sideways motion provided by a 3rd servo located in front. This design is by Yuhang Hu, you can see it in action in his Bipedal Robot video.
 |
| Yuhang Hu - Bipedeal Design |
Disney's researchers took different approach, instead of the Z axis being a single servo, they connected 2 of the leg/knee legs together with a linkage for a single leg. This provided some stability, but doubles the amount of servos to be used.
Here is my first cad/print sketches. I have spent my initial development just building the bracket for the servo motor so that it an have rotation from both sides. This view is also hacked together with parts from another robot, just to get a feel for the connection points and where a potential spring(s) would need to be placed. It was not immediately obvious that this design will fit the criteria.
note: it looks like a step back in design, but this is just the initial drafting and sizing. also, the basis for thoughts for this blog entry.
 |
| prototype-printed-sketch of a 2 dof robot leg. |
While building the above, I also found a potential mechanism that could create a running robot with minimal motors. Perhaps a mechanism instead with the use of a single brushed motor as the actuator.
Jongwon Park,Young Kook Kim, Byungho Yoon, Kyung-Soo Kim, Soohyun Kim ) One aspect of using a motor, the rotation will easily provide circular X and Y motion. The motor is located at O2 and the Hip Joint is statically mounted (to the robot frame).
 |
| Design of a Biped Robot |
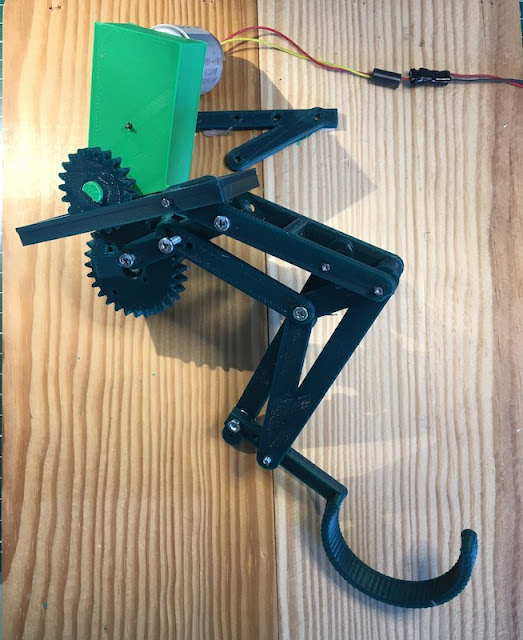
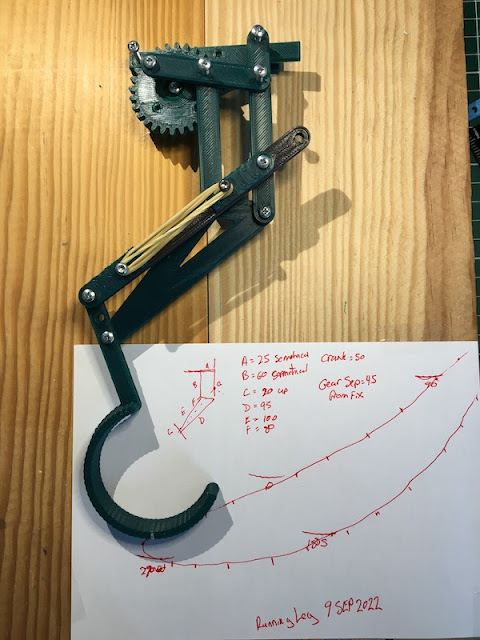
My initial version of this running mechanism. This is just a printed 'sketch' used to determine sizing and placement of the connectors and screws. The black bar is a placeholder for a compliant link that will be a tension spring (a spring that is pulled). the wheel at the top will be driven by a single motor, after some gear reduction. The cam/crank that is attached will need to be short, as in this picture. The distance traveled by this cam has a dramatic impact on the movement of the foot. the bar at the top, represents the framework that the mechanism is attached to. only the top connection and the wheel is fixed to the frame.
 |
| Simple Running Robot Leg Mechanism |
Here is a YouTube Short of the the mechanism.
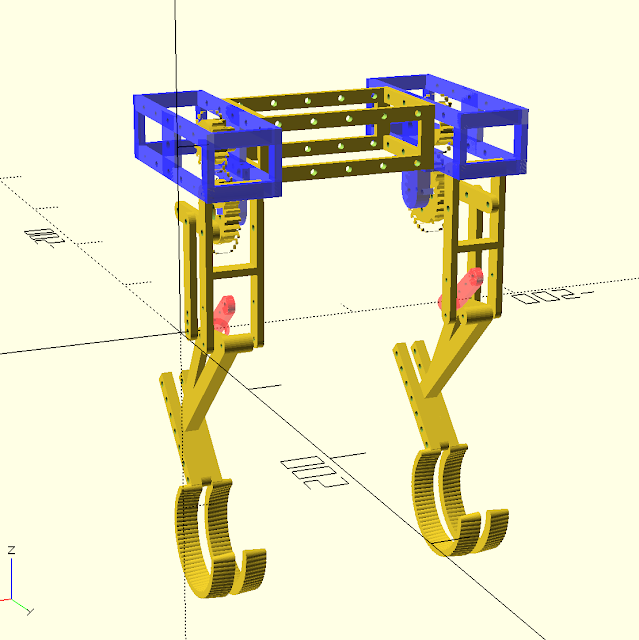
I will be starting a new robot series trying to build a fast running robot with minimal motors. That is the motivation for finding the Stable Robot Leg. The end goal is to create a creature like below, for the Toulouse Robot Race in Nov 2022. :D
 |
| Polecat robot sketch |


